Automating version numbering in Visual Studio Deployment Projects
For many years, Visual Studio has had the option to automatically increment a project’s version number when building that project. However, deployment projects use their own version numbers and ignore the version number of the project they’re deploying. Here’s how you can automate the deployment project’s (and therefore the compiled MSI’s) version number to match the product you’re deploying.
A note on solution and MSI version numbers
WinForms projects (and Windows programs in general) use a 4 part version number in the format [major].[minor].[build].[revision]. Windows Installers (MSIs) use a 3-part version number, [major].[minor].[build]. Because of this, when we get Visual Studio to increment the project’s version number we’re going to have to lose some information to get it into the MSI.
Automatically incrementing the assembly (project) version
We’re going to make Visual Studio (or more accurately, MSBuild) handle the build and revision parts of the version number. As specified in the docs, accepting the defaults for these will set the build number to a value that increases daily (technically, the number of days since 1 January 2000) and the release number to the number of seconds since local midnight, divided by 2. Note that since the revision number is discarded by this script when we apply it to our MSI, building 2 MSIs on the same day will result in them having the same version number even if the assembly revisions are different.
First things first, we need to make VS handle the assembly’s version number. Bizzarely, the Assembly Information dialog you would usually use to change this will not accept the perfectly valid values we’re going to set it to so we’ll have to do it manually.
In Solution Explorer, expand your application’s Properties section and open the AssemblyInfo.cs (or .vb, if that’s your preference) file. Right at the bottom, you should see annotations for AssemblyVersion and AssemblyFileVersion along with a comment on how to set them dynamically. Following Microsoft’s guidance, we’re going to set AssemblyVersion’s third component to “*” and leave the fourth component blank, which will make Visual Studio set the third and fourth components automatically when the project is built. I’m going to comment out the AssemblyFileVersion too. If you do so, VS will set your file version to the same as the assembly version, giving us one less thing to deal with:

Just to confirm what we’ve done (you can skip this step if you so desire), double-click My Project, and in the Application tab click Assembly Information. You should see your assembly version set to whatever you want your major and minor revisions to be, followed by an asterisk and an empty box, like so:

Click OK, save, close, we’re done.
PackageCodes and ProductCodes and UpgradeCodes, oh my!
In addition to a simple version number, internally an MSI has a number of related fields we should look at as well. These are:
- UpgradeCode This GUID signifies what “family” of software a particular MSI is from – Windows Installer uses this to decide if there are any other versions of the same software on the system. For the purposes of this post, we’ll keep it the same.
- ProductCode This GUID identifies a particular release of a piece of software. Different versions and languages of the software should have different ProductCodes. We’ll change it in our script (below).
- PackageCode This identifies a particular installer package – the MSI file on your disk. We’ll change it here but there are reasons you might not want to; see the link below.
For more information on these fields, pusu has written an excellent guide here: https://blogs.msdn.microsoft.com/pusu/2009/06/10/what-are-upgrade-product-and-package-codes-used-for/
The Plan
So, with all that explained, what do we need to accomplish?
- We need to get the version of the assembly and truncate it to a 3-part version number.
- We need to generate a new GUID for the ProductCode.
- We need to generate a new GUID for the PackageCode.
And we need to do all of this after the application is built (so the version number is current), but before the MSI is compiled. Here’s how:
Set Up Your Installer
No rocket science for this bit; make sure your install project is set up: Primary output from your main project in the application folder, shortcut in the programs menu, etc.
Stick To The Script!
We’re going to write a script to sort our versions and GUIDs that will run as a pre-build event of the installer, changing some variables in the project file before it’s compiled.
The script is available for download from https://gist.github.com/therezin/f0334cc0c09bf79e58608935dbca9bd6. I’ve commented it pretty extensively, but we’ll go through it. If you’re not interested in the inner workings, skip this section.
option explicit
dim args          'commandline arguments
dim fso           'filesystem object
dim f             'file handle
dim fbak          'backup copy of file
dim rgx           'regex object
dim rMatches      'regex match
dim rSubmatches   'regex submatches
dim rSplit        'regex submatches, split
dim vnew          'rSplit, unsplit.
dim guid          'Guid object
dim setupFilename 'setup project filename
dim setupProject  'setup project file contents
First up, pretty simple: setting up the variables we’ll need later on. It’s good practice to always start your visual basic scripts with option explicit, as otherwise you can use variables without declaring them. This doesn’t sound bad, but all you have to do is mis-type a variable name and we’re into “undefined behaviour”.
'we need 2 command-line arguments. Quit if we don't have them.
set args = wscript.arguments
if args.count <> 2 then wscript.quit 1

'read project file and rename it as a backup.
Set fso = CreateObject("Scripting.FileSystemObject")
Set f = fso.OpenTextFile(args(1))
setupProject = f.ReadAll
f.Close
fbak = args(1) & ".bak"
if fso.fileexists(fbak) then fso.deletefile fbak
fso.movefile args(1), fbak

set rgx = new regexp
rgx.global = true
Again, not much to say here that’s not in the comments: Make sure we have 2 command-line arguments – we want the source binary and the deployment project file. Then we delete any existing backup and create a copy of the project file in case anything goes wrong.
'find binary's version number
vnew = fso.GetFileVersion(args(0))
rgx.pattern = "(\d+\.\d+\.\d+)\.\d+"
set rMatches = rgx.execute(vnew)
vnew = rMatches(0).submatches(0)
Into the guts of it. We’re getting the file version of the compiled application binary and parsing it, putting the first 3 parts of the version number into vnew.
'find, increment and replace version number
rgx.pattern = "(""ProductVersion"" = ""8:)(\d+(\.\d+)+)"""
set rMatches = rgx.execute(setupProject)
rSubmatches = rMatches(0).submatches(1)
rSplit = split(rSubmatches, ".")
rSplit(ubound(rSplit)) = rSplit(ubound(rSplit)) + 1
setupProject = rgx.replace(setupProject, "$1" & vnew & """")
Just like the comment says, here we’re parsing the .vdproj file for the ProductVersion string and replacing it with vnew.
'replace ProductCode
rgx.pattern = "(""ProductCode"" = ""8:)(\{.+\})"""
guid = CreateObject("Scriptlet.TypeLib").Guid
guid = left(guid, len(guid) - 2)
setupProject = rgx.replace(setupProject, "$1" & guid & """")

'replace PackageCode
rgx.pattern = "(""PackageCode"" = ""8:)(\{.+\})"""
guid = CreateObject("Scriptlet.TypeLib").Guid
guid = left(guid, len(guid) - 2)
setupProject = rgx.replace(setupProject, "$1" & guid & """")
And here, just like it says, we’re replacing the ProductCode and PackageCode with new GUIDs.
'write project file
setupFilename = args(1)
set f = fso.CreateTextfile(setupFilename, true)
f.write(setupProject)
f.close
Simple enough. Write it out.
Build Events
Here’s where we set it to work. Selecting our installer project in the Solution Explorer, we get these properties:
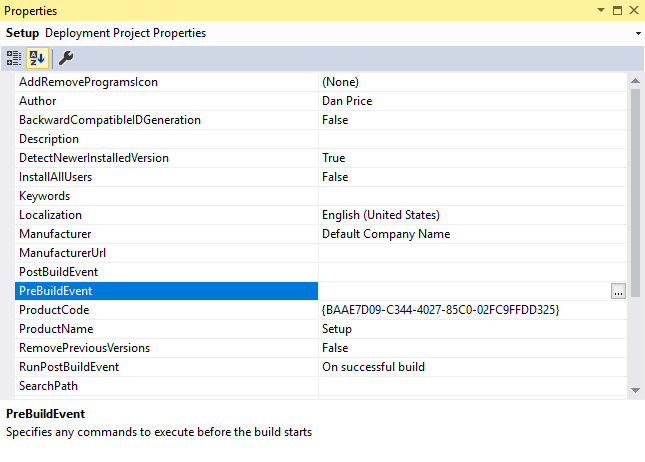
The PreBuildEvent is the one we’re after, and hitting the ellipsis button brings us a neat little editor. “Neat”, because the event scripts have their own macros relating to the project directory and so on.
Our script file is in the root of the solution directory and event scripts are referenced from the project directory, so we’ll have to go up a level. Here’s my script:
$(ProjectDir)\..\SetSetupVersion.vbs $(ProjectDir)\..\MsiDemoApp\bin\$(Configuration)\MsiDemoApp.exe $(ProjectDir)\Setup.vdproj
The format is pretty simple – the VB script I linked above accepts 2 arguments: the name of your compiled application exe, and the deployment project file. Obviously, you’ll want to set the names of your project folder, binary and setup project file accordingly.
Now we’re all set. Simply build your solution and watch as your MSI version is updated to the assembly’s and your GUIDs are replaced with new ones.